 These colorful caps shown in Mother and Daughter sizes were originally designed for Mother’s Day during the week of the G8 summit. When Erssie designed these, Africa was very much on everyone’s mind and so the hats have a Moroccan/North African feel to the styling with a bright checkerboard pattern and Fez style cord and tassel. Shown in two different colorways, each hat involves four colors alternated throughout and the Fair Isle colour work is easy enough for a complete novice. Each starts with a two color rib knitted in the round followed by two color checks and then a square top achieved using paired decreases so that each triangular section decreases towards the center of the crown. Don’t be put off by the term ‘paired decreases’, this has been worked out for you and instructions are simple K2tog or SSK wherever you’re instructed to do so and the shaping will emerge as if by magic. The hats are finished with a two color striped twisted cord and two color tassel. Although they have a square construction, they can be folded neatly into a package that fits easily into your pocket.


Sizes
Child 2 years and above, to fit head circumference 18 inches
Women’s small, to fit head circumference 21 inches
Yarn
Debbie Bliss Cashmerino Aran (55% merino wool, 33% microfiber, 12% cashmere; 98 yd [90m] per 50g skein):
Child’s Hat
Color A: 1 skein in color 008 Chocolate
Color B: 1 skein in color 007 Rust
Color C: 1 skein in color 207 Navy
Color D: 1 skein in color 101 Off White
Mother’s Hat
Color A: 1 skein in color 501 Green
Color B: 1 skein in color 611 Wine
Color C: 1 skein in color 208 Blue
Color D: 1 skein in color 001 White
Note: Each hat uses small amounts of each color so as long as you have approx 20g of each you should have enough.
Needles
US #8 (5 mm): one set of 5 DPNs
US #5 (3.5 mm): one pair of straight needles
Gauge
18 sts and 24 rows = 4 inches (10 cm) in checkerboard pattern on US #8 (5 mm) needles
It is important to test this gauge using two colors as the Fair Isle stranding will produce a tighter gauge than normal.
Notions
Tapestry needle; scrap cardboard for winding yarn around to make tassels; bobbins for keeping lengths of separate colors of yarn, optional.
Abbreviations
Please see our standard list of abbreviations.
Stitch Patterns
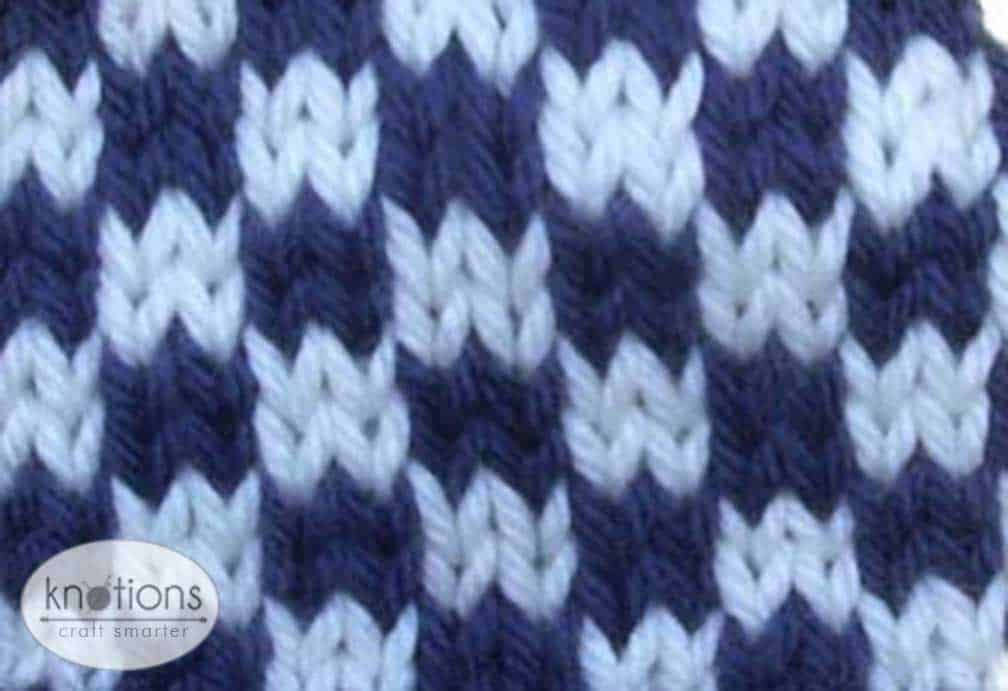
Checkerboard Pattern
Rnds 1 and 2: *K2 Color C, k2 Color D; rep from * until end of the rnd.
Rnds 3 and 4: *K2 Color D, k2 Color C; rep from * until end of the rnd.
Rep these 4 rnds 3 times for a total of 12 rounds (6 squares)
Rep rnds 1 and 2 once more.
Note: There is no need to twist yarns, you can just keep both yarns at back of work and drop one and pick up the other when you need it which will form a neat stranding at the back of the work i.e. Fair Isle technique.
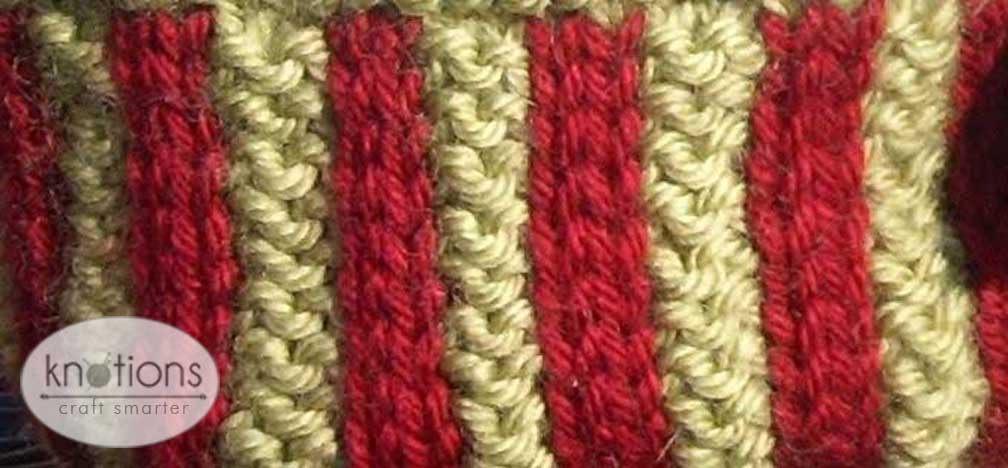
Two Color Ribbing
P2 Color A, k2 Color B for number of rnds specified
There is no need to twist yarns, you can just keep both yarns at back of work and drop one and pick up the other when you need it which will form a neat stranding at the back of the work i.e. Fair Isle technique.
You can make adjustments to the height of the hat at this point by adding or subtracting ribbed rounds.
Pattern
Daughter (Mother) Hats
Using yarn A CO 80 (96) sts
Divide between four dpns and join, pm for beg of rnd.
P 3 rnds in yarn A.
Join yarn B and using the 2 color ribbing pattern complete 10 (12) rnds.
Using yarn A only
K 1 rnd
P 2 rnds
Using yarns C and D complete 14 rounds of the checkerboard pattern as described above
Using yarn A
K 1 rnd
P 2 rnds
Now rearrange your stitches to ensure center back and corner decreases occur in the right places as follows:
Slip 10 (12) sts at the beg of the rnd and leave on dpn 1,
slip next 20 (24) sts on to dpn 2,
slip next 20 (24) sts on to dpn 3,
slip next 20 (24) sts on to dpn 4,
slip last 10 (12) stitches on to dpn 1 with first 10 (12) stitches.
You should now have 20(24) stitches on each dpn with the old beg of the rnd and your yarn tails on the center of one of dpns. This will be center back of the hat.
Starting at dpn 1, the new beg of the rnd K one rnd with B.
Start paired decreasing to form a square top as follows:
Next rnd: (K2tog, k until 2 sts rem, ssk) 4 times i.e. once each dpn
Rep this rnd until there are 8 sts rem (2 stitches on each needle). Cut yarn leaving a long tail and thread through a tapestry needle
Thread yarn through all 8 sts and pull up tightly but leave a very small hole in the center to be able to thread through a cord later.
Finishing
Striped Twisted Cords
Using yarn C and yarn D make a twisted cord.
Cut 3 lengths of Yarn C and 3 lengths of Yarn D about 1yd / 1m each.
Tie ends of yarn together to make circle of yarn.
Loop yarn over door handle, chair post, or chair leg making sure that there is a different color at each end of your loop, joins in the center.
Insert a pencil, pen or dpn into loop at opposite end.
Pull taut and twist yarn by spinning pencil/pen/dpn until yarn starts to twist back on itself. Slide a finger half way along length of twisted yarn still keeping end taut.
Fold yarn twist in half and put loop/pencil/pen/dpn together with loop over door handle.
Let go of finger holding halfway mark and allow yarn to twist on itself.
Tie knots at the beginning and end of the cord to secure the twisted strands and cut below the knot to create a small tassel.
Tassels
Cut a rectangle of cardboard roughly the length you wish your tassel to be.
Using yarn A and yarn B in equal amounts wind around the card, roughly 20 times each.
Then, cut a slit into the card roughly where you want the head of the tassel to be and slide some of your yarn along this slit and secure by winding around the head of the tassel.
Remove the card.
Wind more yarn around the head of the tassel to secure.
Cut the loops at the bottom of the tassel.
Attach the tassel to one end of the twisted cord.
Thread the other end of the twisted cord through the center of the hat and secure on the inside so that the tassel reaches approximately the center of the height of the hat.
Weave in all the ends.
Wash the hat quickly by dipping into lukewarm water with conditioner and then rinsing in lukewarm water.
Block the hat by drying on a square box roughly the same size as the hat or by inserting some cardboard in the top of the hat.
If you don’t have anything square shaped, then you can dry flat along the folds of the hat to maintain the square shape.
About the Designer: Erssie Major
 Erssie Major has enjoyed knitting and crochet on and off since she was 4 years old and she loves to write simple knitting and crochet patterns for on line magazines, print magazines and books. She lives with her partner and two rescued greyhounds. Her blog Skeinspotting: A World of Erssie Knits documents her knitting adventures as well as knitting patterns, book and yarn reviews, links to other free patterns and craft community websites and the Erssie Knits gallery. She also writes a blog about rescued greyhounds where occasionally her interests in knitting and dogs overlap resulting in amusing photo collections of hounds in knitwear. Erssie has a long term chronic illness with disabilities and as such is committed to the idea of knitting as therapy.
For more ideas, free patterns, tutorials and ready made knitwear visit her blog and the Erssie Knits Photo Gallery.
You can find her on Ravelry under the user name Erssie.
Pattern and images © 2005-2008 Erssie Major.


Leave a Reply