
Knitting a top down raglan is probably my favorite way to make a sweater. There’s so much to love — try on as you go, minimal finishing, and once you get past the yoke it feels like the rest flies by.
But, traditional raglan shaping can be lacking in good fit — especially if you’re short or wear a larger size. The armholes get too long, the sleeves get too wide and you’re left looking frumpy.
This pattern addresses those fit issues. The yoke is a just a bit more complicated than most top-downs — the increase rate varies to take into account how a woman’s body is really shaped and the armholes and sleeve widths are designed to fit our standard measurements. Check the schematic and custom fit yours if you need a little more here and a little less there. I’ve included 14 sizes in hopes of giving you a good basis to start.
Don’t let the length of the pattern intimidate you — it’s not because it’s complicated but because I’ve spelled out directions for each size to make it easier. In the few places where each size differed greatly, I wrote out the sizes separately. Ah the joys of publishing on the web.


Sizes
To fit bust: 28 (30, 32, 34, 36, 38, 40, 42, 44, 46, 48, 50, 52, 54)”
Length: 24.75 (24.75, 25.5, 25.5, 26.5, 26.5, 26.5, 26.75, 26.75, 27.25, 27.25, 27.5, 27.5, 27.75)”
Yarn
Sublime Soya Cotton (50% cotton, 50% soy; 120 yd [110m] / 50g ball): color #80 Indigo, 6(6,7,7,8,8,9,9,10,10,11,11,11,12) balls
Needles
US #5 (3.75 mm): circular needles – 24″ or 32″, depending on size.
Gauge
22 sts and 28rows = 4 inches (10cm)
Notions
Tapestry needle; stitch holder; cable needle (or other small needle to hold a single stitch).
Abbreviations
Please see our standard list of abbreviations.
LLI – Left Lifted Increase
RLI – Right Lifted Increase
LLIP – Left Lifted Increase, Purl
RLIP – Right Lifted Increase, Purl
{see our tutorial on lifted increases}
Body
CO 2, pm, 20 (20,18,16,16,14,16,16,14,12,12,12,12,8), pm, 36(38,38,40,42,42,44,46,46,46,46,48,48,48), pm, 20(20,18,16,16,14,16,16,14,12,12,12,12,8), pm, 2; 80 (82,78,76,78,74,80,82,78,74,74,76,76,68) sts total.
Setup Row: Purl 1 row, slipping all markers.
Yoke
Note
Please read before proceeding to the instructions for your size
You will be working increase rows on both RS and WS rows. If you have knit other top down raglans, these instructions may look different to you.
RS inc row: * k to 1 st bef m, kf&b, sm, kf&b * 4 times, k to end of row. 8 sts increased.
WS inc row: * p to 1 st bef m, pf&b, sm, pf&b* 4 times, p to end of row. 8 sts increased.
The raglan increases are worked in 3 sections – shoulder, body, and underarm. If you need to adjust the length of your yoke, work fewer or more plain rows in the body section, retaining the same number of increases throughout that section.
Note that the V neck increases are worked at the same time the raglan increases are worked. Use a row counter to keep track of the number of rows you have worked so you will know when to begin the V neck increases (see V neck increases below).
Shoulder Increases
Sizes 28 and 30 – Setup row (RS): knit, slipping all markers (no increases)
All Sizes – Work increase rows every 2 (2,1,1,1,1,1,1,1,1,1,1,1,1) rows for a total of 8(8,5,5,8,9,11,5,7,7,7,7,9,11) rows; 112 (114,118,116,142,146,168,122,134,130,130,132,148,156) sts.
Body Increases
Work increase rows every 3(3,3,3,3,3,3,2,2,2,2,2,2,2) rows for a total of 24(27,33,36,33,33,30,38,38,42,44,44,38,44) rows.
RS neck increase row: k1, lli, work until 1 st rem, rli, k1
WS neck increase row: p1, llip, work until 1 st rem, rlip, p1
At the same time, after working 14(15,23,24,20,23,20,25,25,29,29,28,26,30) body rows, continue raglan increases and begin V neck increases as follows:
Increase 1 st at each neck edge of every row for 17(18,18,19,20,20,21,22,22,22,22,23,23,23) rows; 196(210,226,236,256,254,268,300,312,324,336,340,324,360)
Underarm Increases
Continue V neck increases as instructed above, and begin underarm increases as follows:
Sizes 28, 32 – Setup Row (RS): knit, slipping all markers (no increases).
All Sizes – Work increase rows every 2(2,2,2,2,2,2,2,2,2,1,1,1,1) rows for a total of 6(6,6,6,6,10,10,8,8,8,7,7,11,9) rows.
Sizes 32-36, 40-46 – Setup Row (WS): purl, slipping all markers (no increases); 234(246,266,274,294,314,330,350,362,374,406,410,434,450) sts
Divide Yoke
Divide body and sleeve as follows, removing all markers and using backward loop for all CO
(RS): K to first marker, place stitches on waste yarn between this and next marker (left sleeve), CO 3(3,3,4,4,4,4,4,5,5,5,6,6,6), pm (denotes side seam), CO 3(3,3,4,4,4,4,4,5,5,5,6,6,6), k36(38,41,44,47,50,52,55,58,60,64,66,69,72), pm (marks beg of rnd), knit to next marker, place stitches on waste yarn between this and next marker (right sleeve), CO 3(3,3,4,4,4,4,4,5,5,5,6,6,6), pm (denotes side seam), CO 3(3,3,4,4,4,4,4,5,5,5,6,6,6), knit to 2 sts before edge of right front neck.
Join fronts as follows:
Sl 1 wyib, place next st on cn and hold at front of work. Return sl st to left needle and ssk. PM (denotes wrap edge) and replace st held by cn on left needle and ssk. Knit to end of rnd (sm at center back); 144(152,164,176,188,200,208,220,232,240,256,264,276,288) sts.
Body
Begin working in the round.
Size 28
Rnd 1 (edge movement rnd): Knit to 1 st bef wrap edge m, rli, k1, sm, ssk, knit to end of row.
Rnd 2: Knit to m, sm, sl1, knit to end of row.
Sizes 30-32
Rnds 1, 3, 5-6, 8, 10 (edge movement rnds): Knit to 1 st bef wrap edge m, rli, k1, sm, ssk, knit to end of row.
Rnds 2, 4, 7, 9: Knit to m, sm, sl1, knit to end of row.
Size 34
Rnds 1-2, 4-5, 7-8, 10 (edge movement rnds): Knit to 1 st bef wrap edge m, rli, k1, sm, ssk, knit to end of row.
Rnds 3, 6, 9: Knit to m, sm, sl1, knit to end of row.
Size 36
Rnds 1, 3-4, 6-7, 9, 11 (edge movement rnds): Knit to 1 st bef wrap edge m, rli, k1, sm, ssk, knit to end of row.
Rnd 2, 5, 8, 10: Knit to m, sm, sl1, knit to end of row.
Size 38
Rnds 1-3 (edge movement rnds): Knit to 1 st bef wrap edge m, rli, k1, sm, ssk, knit to end of row.
Rnd 4: Knit to m, sm, sl1, knit to end of row.
Size 40
Rnds 1-4 (edge movement rnds): Knit to 1 st bef wrap edge m, rli, k1, sm, ssk, knit to end of row.
Rnd 5: Knit to m, sm, sl1, knit to end of row.
Size 42
Rnds 1-5 (edge movement rnds): Knit to 1 st bef wrap edge m, rli, k1, sm, ssk, knit to end of row.
Rnd 6: Knit to m, sm, sl1, knit to end of row.
Size 44
Rnds 1-8 (edge movement rnds): Knit to 1 st bef wrap edge m, rli, k1, sm, ssk, knit to end of row.
Rnd 9: Knit to m, sm, sl1, knit to end of row.
Size 46
Rnds 1-11 (edge movement rnds): Knit to 1 st bef wrap edge m, rli, k1, sm, ssk, knit to end of row.
Rnd 12: Knit to m, sm, sl1, knit to end of row.
Sizes 48-50
Rnd 1 (edge movement rnd): Knit to 1 st bef wrap edge m, rli, k1, sm, ssk, knit to end of row.
Size 52
Rnds 1-12 (edge movement rnds): Knit to 1 st bef wrap edge m, rli, k1, sm, ssk, knit to end of row.
Rnd 13: Knit to 1 st bef wrap edge m, rli, k1, remove marker, place next st on cn and hold at front, k1, replace marker, ssk (1 st from cn and 1 st from bodice), knit to end
Size 54
Rnds 1-7 (edge movement rnds): Knit to 1 st bef wrap edge m, rli, k1, sm, ssk, knit to end of row.
Rnd 8: Knit to 1 st bef wrap edge m, rli, k1, remove marker, place next st on cn and hold at front, k1, replace marker, ssk (1 st from cn and 1 st from bodice), knit to end
Follow the above Faux Wrap rnds for a total of 24(5,5,5,5,13,11,9,6,4,57,59,4,7) reps. Then, rep Edge Movement Rnd only for an additional 5(1,4,2,5,4,1,3,3,9,0,0,6,2) times.
Begin Waist Decreases
At the same time, after working 18(16,19,17,25,21,21,22,22,22,22,24,23,23) rnds, work waist decs while continuing to work faux wrap edge as instructed above.
Waist Decrease Rnd: Work to 3 sts bef side seam m, k2tog, k1, sm, k1, ssk, work to next marker (following the appropriate Faux Wrap Edge Rnd from above), work to 3 sts bef side seam marker, k2tog, k1, sm, k1, ssk, work to end of row; 2 sts dec’d.
Rep Waist decrease rnd every 7 rows an additional 4 times; 20 sts dec’d – 124(132,144,156,168,180,188,200,212,220,236,244,256,268) sts rem.
Waist decrease rnd will end before Faux Wrap Edge rnds. Work waist evenly until Faux Wrap rnds are complete.
Short Rows (optional)
Put the sweater on some waste yarn or spare needles (pick a needle no bigger than what you’re knitting with so you don’t stretch out the stitches) and try it on. Does the front bow up at all or does it lay straight across? If it bows up, add in a few short rows to make up the difference. Measure the height of the bow in the front, and using that height for the short rows, follow the directions in our tutorial. Insert the short rows before continuing on to do the hip shaping.
You may be wondering why I’m suggesting you add short rows at the waist. That’s because there’s a lot of shaping going on the in the bodice — the faux wrap stitches have been calculated exactly for each size. If you add short rows in this section, you would have to adjust the rate of movement of the faux wrap stitches.
Begin Hip Section
Work evenly for 1 inch (approx 8 rnds) ending with Rnd 2, as foll:
Rnd 1: Knit
Rnd 2: Knit to wrap edge m, sl 1, knit to end.
Begin Hip Increases
Rnd 1: Work to 2 sts bef side seam m, rli, k2, sm, k2, lli, work to wrap edge m, rli, sm, k2, sm, k2, lli, work to end; 4 sts inc’d.
Rnds 2, 4, 6: Knit to wrap edge m, sl 1, knit to end.
Rnds 3, 5: Knit
Rep above 6 rnds for a total of 5 times; 20 sts inc’d – 144(152,164,176,188,200,208,220,232,240,256,264,276,288) sts.
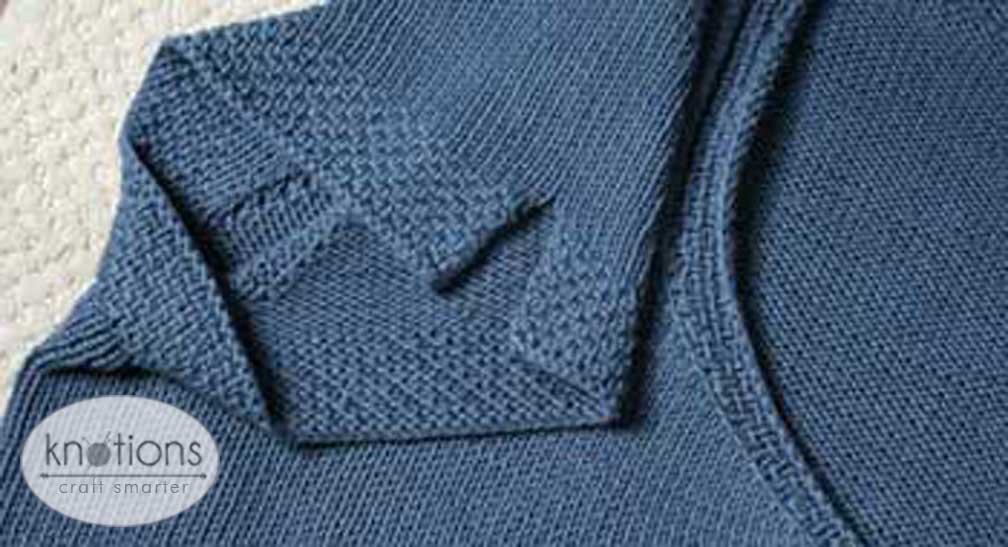
unwrapped side slit close-up
Begin Bodice Hem
Front and back are now worked separately.
Setup Row: Knit to side seam m, remove m and place back sts on a st holder. Working on front sts only:
Row 1 (RS): K1, *k1, sl 1 wyif*, rep betn *’s until 1 st rem, k1.
Rows 2 and 4 (WS): K1, purl until 1 st rem, k1.
Row 3: K1, *sl 1 wyif, k1*, rep betn *’s until 1 st rem, k1.
Rep the above 4 rows for 3-¼ inches, approx 32 rows.
Bindoff as follows: Sl 1 wyib, p1, insert left needle into slipped st on right needle and pull this st over the st just worked and off the needle. One st bound off.
*Move rem st on right needle to left needle, p2tog* rep betn *’s until all sts have been worked and no sts rem on left needle. Cut yarn and pull through rem st.
{view a close-up of the bindoff}
Sleeve Hem
Join yarn at left side seam and work back flap same as front.
(both alike)
Sleeves are worked back and forth with a split at the center top.
Starting at center top with WS facing, place sts from holder onto working needle, skipping sts that were cast on for the bodice (they will be picked up in setup row below).
Setup Row 1 (RS): Knit until you reach bodice CO sts, pickup 6(6,6,8,8,8,8,8,10,10,10,12,12,12) sts, knit until end of row; 56(60,64,64,68,70,74,78,82,86,92,96,104,106) sts.
Setup Row 2 (WS): Purl.
Row 1 (RS): K1, *k1, sl 1 wyif*, rep betn *’s until 1 st rem, k1.
Rows 2 and 4 (WS): K1, purl until 1 st rem, k1.
Row 3: K1, *sl 1 wyif, k1*, rep betn *’s until 1 st rem, k1.
Rep the above 4 rows for a total of 1-½ inches, approx 12 rows.
Bindoff as directed for front bodice.
Beginning with right edge of neck and with RS facing, pickup 3 out of every 4 sts along entire neck (that is, pickup a st in each of the first 3 sts, skip the 4th, pickup a st in each of the next 3 sts, skip the 4th), ending with center front of left edge of neck taking care to pickup an even number of sts.
Note: You will be doing short rows to shape the neck.
Sizes 28 – 34
Setup Row (WS): Purl until 18 sts rem, turn.
Row 1: *K1, sl 1 wyif*, rep betn *’s until 18 sts rem, turn.
Row 2: Purl until 14 sts rem.
Row 3: *sl 1 wyif, k1*, rep betn *’s until 14 sts rem, turn.
Row 4: Purl until 10 sts rem.
Row 5: *K1, sl 1 wyif*, rep betn *’s until 10 sts rem, turn.
Row 6: Purl until 6 sts rem.
Row 7: *sl 1 wyif, k1*, rep betn *’s until 6 sts rem, turn.
Row 8: Purl until 2 sts rem.
Row 9: *K1, sl 1 wyif*, rep betn *’s until all sts are worked, turn.
Row 10: Purl.
Sizes 36 – 40
Setup Row (WS): Purl until 20 sts rem, turn.
Row 1: *K1, sl 1 wyif*, rep betn *’s until 20 sts rem, turn.
Row 2: Purl until 16 sts rem.
Row 3: *sl 1 wyif, k1*, rep betn *’s until 16 sts rem, turn.
Row 4: Purl until 12 sts rem.
Row 5: *K1, sl 1 wyif*, rep betn *’s until 12 sts rem, turn.
Row 6: Purl until 8 sts rem.
Row 7: *sl 1 wyif, k1*, rep betn *’s until 8 sts rem, turn.
Row 8: Purl until 6 sts rem.
Row 9: *K1, sl 1 wyif *, rep betn *’s until all sts are worked, turn.
Row 10: Purl.
Sizes 42 – 54
Setup Row (WS): Purl until 22 sts rem, turn.
Row 1: *K1, sl 1 wyif*, rep betn *’s until 22 sts rem, turn.
Row 2: Purl until 18 sts rem.
Row 3: *sl 1 wyif, k1*, rep betn *’s until 18 sts rem, turn.
Row 4: Purl until 14 sts rem.
Row 5: *K1, sl 1 wyif*, rep betn *’s until 14 sts rem, turn.
Row 6: Purl until 8 sts rem.
Row 7: *sl 1 wyif, k1*, rep betn *’s until 8 sts rem, turn.
Row 8: Purl until 6 sts rem.
Row 9: *K1, sl 1 wyif*, rep betn *’s until all sts are worked, turn.
Row 10: Purl.
Bindoff as directed for front bodice.
Tie
CO 8
Row 1 (RS): K1, *k1, sl 1 wyif*, rep betn *’s until 1 st rem, k1.
Rows 2 and 4 (WS): K1, purl until 1 st rem, k1.
Row 3: K1, *sl 1 wyif, k1*, rep betn *’s until 1 st rem, k1.
Rep above 4 rows until tie is desired length – approx 24 inches longer than waist. Tie will stretch lengthwise. Measure tie by stretching. The best way to measure it is to try it on and tie it as tightly as you would wear it.
Bindoff as directed for front bodice.
Finishing
Weave in ends.
Schematic

About the Designer: Jody Richards

Jody is a lifelong knitter, long-time knit blogger, and the founder of Knotions. She thanks her mom for teaching her how to sew (there’s no better way to learn fit), her dad and uncles for never telling her that girls can’t do math (there’s no better way to make knitting fit), her Aunt Betty’s old craft books for teaching her how to knit (there’s no other way to learn in a family who knows everything but knitting), and Marnie MacLean for her awesome tutorial on creating schematics (there’s no better explanation out there). She lives in New Jersey, just outside of Philadelphia, and can’t wait for the day she can call Philly her home again.
Pattern and images © 2008 Jody Richards.


Still a classic style easily worn by most body types, especially with all the sizes you’ve included! One question, I can’t seem to find where you work the sleeves…am I staring right at it? Or did I overlook it under a different heading?
Oops – there wasn’t a heading (but it’s there now). You don’t work the sleeves any more than what you do on the yoke, so all you do is the hem.